Chickcozy Incubator
Chickcozy Incubator: Twenty-five-egg table top chicken egg incubator that manages temperature and humidity well, and tends toward high hatch rates.

With good reason is this incubator gaining a strong following.
The Chickcozy has been on the market since approximately 2024. It offers solid service along with some very cool and convenient perks. As an easy-to-use, semi-automatic incubator, it boasts all of the standard features of a semi-automatic tabletop chicken egg incubator, and a bit more:
- Thermostat: Factory-set to 99.5 Fahrenheit (37.5 Celsius). Can be adjusted at the press of a button.
- Air circulating fan. Functions automatically.
- Humidity gauge: Supports manual regulation of humidity.
- Four water wells: Humidity regulation in nearly any environment.
- Auto egg turning: Five trays turn side to side on a pre-determined schedule. Turning mechanism can be tested at the press of a button.
- Egg Candler: Operate by pressing a button.

- Automatic cessation of egg turning. The incubation process counts down from 21 days, and then automatically stops turning on day 3 (lockdown day). Reset the countdown at the start of each hatch by pressing and holding two buttons.
Additional Thoughtful Design Perks
- Pull-out humidity tray: Very easy to fill compared to those little external ports on some other incubators.
Incubators with attached bottles that keep the humidity wells full do reduce the need to constantly refill the wells. Then again, there are a lot of chicken raisers that either prefer a lower humidity, or like to dry-hatch. If this is you, the pull-out tray will be an excellent option.


- Fold-down handle at the top of the lid. This is a wonderful design enhancement. The handle is hinged and well balanced - it requires only one hand to lift the lid and set it down when candling, placing eggs on lockdown, removing chicks, or cleaning the incubator.

- A wide lip on the base of the incubator. Pictured below is the wide orange lip, which is a full 5/8 inches (1.58cm) deep. It receives and centers the lid with ease. Coupled with the one-handed handle on the lid, I wonder that no other manufacturers thought of this years ago.
It really is no small thing! You know what I mean if you've ever needed to fetch a chick out of the incubator and then tried to replace the lid rapidly before the machine lost much heat or humidity, but the lid was just a hair crooked and it took half a minute and two hands to find the correct grooves into which to settle the lid....

Hatching with a Chickcozy Incubator

The Chickcozy is an easy incubator to use.
To start:
- Load the eggs
- Add the humidity water in well "A" in the pull-out tray
- Test and verify the internal incubator temperature.
During the first 18 days (days 21 to 03):
- Top off the "A" well once a day
- Counting down, candle on days fourteen, seven, and three (lockdown day), and remove any non-developing eggs
For lockdown (days 3 to hatch):
- Remove the turner trays and place the eggs carefully on the mat
- Fill reservoirs "A" and "B" (and C and D depending on the humidity readings)
Temperature
The thermostat for the Chickcozy is pre-set to 99.5F (37.5C) which is ideal for chicken eggs.
 Two thermometers (one is a mercury thermometer) measuring the internal temperature of the incubator.
But, the accuracy of the temperature is wholly dependent upon the accuracy of the thermostat sensor. Your machine might be spot on, but it also might not be, even right out of the box. As with any incubator, always start the hatching process by verifying the internal temperature of your copy of the Chickcozy.
The instruction manual explains in detail, plus illustrates how to verify the incubator's internal temperature and humidity. Ensure accuracy by using at least two liquid (mercury) thermometers and a hygrometer or two for measuring humidity.
Once you know the actual inside temperature, you will be able to tweak the thermometer settings so that the actual internal temperature will be close to 99.5F (37.5C).
For my copy of the Chickcozy incubator, I adjusted the thermostat upwards by 2 degrees Fahrenheit in order to register an internal temperature of 99.5 F and therefore achieve an excellent hatch rate. It is now set at 101.5F (38.61C).
Humidity
Four Humidity Wells in the Chickcozy:
- Well A is located in the middle of the convenient pull out water tray at the bottom of the Chickcozy incubator, and is marked with an A. Despite holding less than 1/2 cup water, this reservoir is designed to provide sufficient water surface area by itself to maintain the incubator between 45% - 50% humidity for days 1 - 18.
- Well B includes the rest of the pull out tray. It wraps around Well A, and is clearly marked with a B. Filling this well adds another 1/2 cup of water to the incubator. Fill both A and B on day 18 as the hatch goes into the lockdown stage of incubation.


- Well C: Well C is located in the very front of the incubator in the orange base by the egg turner trays. It is marked with a C. If you blow up the photo above right, you'll be able to read the affixed notice: "If needed, add water to C and D."
- Well D: Well D is located at the back of the incubator also by the egg turner trays. It looks similar to C, and is marked with a D.
Between all four wells, there should be enough water capacity to maintain the desired humidity levels for virtually every environmental or climate contingency.
Personally, I have needed only A and B to achieve excellent hatches, with humidity levels around 47%, increasing to 60% - 70% as eggs actively hatch.
Manual Humidity Control:
Humidity levels are not automated; they must be manually controlled. That is, the keeper manages a balancing act between the amount of water in the humidity tank (or tanks) and the aperture of the air vent in the lid.
The design of the Chickcozy is intended to ensure humidity values appropriate for each stage of incubation. Adjust for around 45% - 50% for the first 18 days, and 60+% from lockdown to hatch. Adding water to both "A" and "B" wells enables the higher humidity.
My copy of the Chickcozy incubator is able to maintain a humidity of up to 54% by filling only the "A" humidity well. This can be reduced somewhat by opening the air vent wider than half open.
Personally, I prefer a humidity under 50% for the early days, but what is most important are the results. With a hatch rate of 100% for the latest hatch in this incubator, I'm not complaining.
Air Vent Opening:
Every incubator has an air vent, including the Chickcozy. You can see it at the left of the photo above. The air vent opening should be open an absolute minimum of 33% in order to permit sufficient air exchange through the porous egg shells. Recommended opening is 50% for the first 18 days.
I live in the already damp Pacific Northwest not far from some of the wettest climates on the planet. So it turns out that on the North Olympic Peninsula where I live, the vent needs to be open at least 50% so that excess humidity in the incubator can escape. This may not be the case if you live in bone-dry climates such as Arizona or Nevada.
During lockdown and hatch, I throw the vent wide open, which allows sufficient air flow so the chicks can breathe inside their shells.
Hydrogen Peroxide in the Incubator Water
The Problem: Twenty-one days of "warm and moist" inside any chicken egg incubator can result in the build up of pathogenic germs that can infect and kill chicken embryos. If you've hatched more than one or two clutches of chicks you may have noticed that the first couple hatches in the same incubator do well, and then the hatch percentages begin to seriously drop. The cause may be contamination of the eggs by bacteria.
There is a fix for this: Add 3% hydrogen peroxide to the incubator water.
Hydrogen peroxide kills germs through oxidation. It is also cheap. Add it to water at a ratio of approximately 1:5, more or less. For example, add 3 ounces of 3% hydrogen peroxide to 15 ounces of water, then pour from this mix into the incubator wells. This solution kills germs, preventing their build up in the warm and moist incubator environment.
If your experience is like mine, your hatch rate will return to 100%, or nearly so.
Loading the Eggs into
the Chickcozy Incubator
The incubator instruction manual is very well written, offering not only how to operate the incubator, but also giving explanations for why. It is quite informative.
Here is the general procedure for beginning an incubation in the Chickcozy:
- Test the turner mechanism: Plug in the turner mechanism, and follow directions on the lid under "Egg Turner Test." This is a matter of pushing a button. If you release the button when the turner is straight, you can then load the eggs with ease. It's nice that all the info you will need with every hatch is explained on the lid of the incubator.
- Load eggs. The incubator holds 25 chicken eggs.
- Add Water: The pull out tray has 2 compartments, marked A, and B. Fill only the center compartment (A) to the top with water. (Make that peroxide-water.) "A" holds more than 1/3 cup water. You will fill up both "A" and "B" only at lockdown, and will have the option of adding water to "C," "D," or both, depending on your climate and humidity needs. All four compartments combined hold approximately one cup water.)
- Reset the days to 21. This step needs to be accomplished with each new hatch because of the automatic turning feature. If you fail to do the reset, the incubator will be stuck on day zero, and not realize that it now contains a new clutch of eggs. Resetting the days involves pushing and holding a couple buttons at once. Easy peasy. Now the turner will be activated for 18 days, and will automatically stop three days before hatch.
Frankly, most users will at lockdown (3 days before hatch) simply remove the trays and unplug the turner, laying the eggs on the bottom of the incubator or on a rubberized shelf-liner. That is also what I do.
Another Important Note: This reset button not only resets the day count to 21, it apparently also resets the entire incubator to the factory settings, including the temperature. So, verify your desired temp setting before walking away. - Verify Temperature Accuracy: The temperature sensor is set at 99.5F at the factory, which is perfect for chickens. Always verify the actual internal incubator temperature by getting internal readings using analog thermometers, and an electronic one as well, if you like. The manual is explicit about how to go about verifying the temperature.


Incubating with the Chickcozy
Chickens take 21 days to hatch. To stay on schedule, I make a note of the following dates and attach it to the incubator:
- Set Date (when eggs added to incubator)
- First Candling Date (7 days after set)
- Second Candling Date (14 days after set)
- Third Candling plus Lockdown Date (18 days after set)
- Hatch Date (21 days after set)
If you need to, you can also add timers in your breeding app or mobile phone calendar.
Temperature and Turning
Both temperature and turning are automated in the Chickcozy. You will have checked the thermostat and made any adjustments needed to ensure an internal temp of 99.5F.
The turning mechanism is also automated for 18 days, after which it automatically stops turning. The only condition you will need to pay attention to is the humidity...
Mind the Humidity Level
Minding humidity levels for twenty-one days is the price of using a semi-automatic incubator in stead of a fully automatic one. But with the Chickcozy, that price is very nearly painless, since 24/7 humidity control is so easy.
For 18 days, keeping the A reservoir topped off once a day maintained the humidity at around 47-50% in my home and climate. Perfect! Boosting that to a desired 60% at lockdown was simply a matter of filling up the "B" reservoir.
With up to four water wells in the incubator, you should be able to achieve the desired humidity in any climate.
The Hatch
Humidity during the hatch: Because humidity is manually maintained, and because every hatched egg releases additional moisture into the incubator, keep a good eye on humidity levels during the actual hatch.
If humidity creeps much above 75%, AND the vent is wide open, get creative about reducing it. For example, you can pull out the humidity tray and empty out some of the water until the humidity drops to 75% or a bit lower.
Rubberized base: The mat at the bottom of the incubator is fairly thick and very grippy. This eliminates the need to add any rubberized shelf liner. Chicks will be able to stand and walk quickly, avoiding feet and leg problems. (Pictured below.)

Cleaning the Chickcozy Incubator
Cleaning the Chickcozy is easy - no parts to dismantle, no screws to remove or reinstall.
Clean the Top of the Incubator

The top of the incubator houses all the electronic components, like the temperature thermostat and the hygrometer measuring humidity. None of this should get wet.
Wipe down the clear plastic top and the fan housing with a very mild warm water/bleach solution, removing any dust, down, and dander. No need to rinse.
Remove the fan cover. Wash and rinse. Wipe down the fan blades with a very weak bleach solution, removing the down and dander. No need to rinse. Reinstall.
Clean the Base
- Remove the white water tray under the incubator. Wash with soapy water, rinse well, reinstall.
- Remove the orange rubber mat at the base of the incubator. Wash in soapy water, rinse well and reinstall (pictured below right).
- Wipe down the interior of the orange base with soapy water and rinse well. There IS a motor behind the rocker arm; take care to not submerge that side of the orange incubator base (see close up photo below).


Reassemble the Chickcozy Incubator
Because the Chickcozy needs less dismantling than many of the other favorite tabletop incubators, it also requires a minimum of reassembly. Just put the pieces back together, as described above.
Purchase a Chickcozy Incubator
- Purchase a Chickcozy Incubator from Chickcozy. (ad)
- Purchase a Chickcozy Incubator on Amazon. (ad)
- You may be able to find used units on FB Marketplace or other marketing avenues such as eBay.
After-market accessories for your Chickcozy incubator can be found here: https://www.etsy.com/shop/CourdtCreations (link shared gratis)
Overheard...
Tasty Recipe! "I processed my first batch of Bresse... Today I roasted one according (somewhat) to the recipe posted on Ambresse. It was delicious! Tender, moist and succulent... So happy I chose this breed!" (B.E., MN, 12/11/2024).
Success: "I can't believe all the inquiries we get through your website. And it's been a great resource to send people to who are interested in the (AB) breed" (Utangard Farm, NH, 5/5/2025).
Informational: "Your site has the first accurate information about American Bresse chickens that I have seen in English. Thanks for your diligent work" (L. Wooton, NC, 12/17/2024).
Overheard...
"I processed my first batch of Bresse... Today I roasted one according (somewhat) to the recipe posted on Ambresse. It was delicious! Tender, moist and succulent... So happy I chose this breed! (B.E., MN, 12/11/2024).
"Your site has the first accurate information about American Bresse chickens that I have seen in English. Thanks for your diligent work" (L. Wooton, NC, 12/17/2024).
Our Local Partner

Hope Rising Microgreens grows and supplies ultra-fresh nutritious microgreens to the communities on the North Olympic Peninsula in WA.
Translate This Page
Traduire Cette Page
Traduzca Esta Pagina

News
August 2026:
The American Bresse Club is taking shape! The linked website is in beta mode; would you like more info or to help test its functions? Yes? Click the link above. (Beta testing is free!)
For now, Ambresse is still hosting the American Bresse Club web pages (linked here and on the navigation bar).
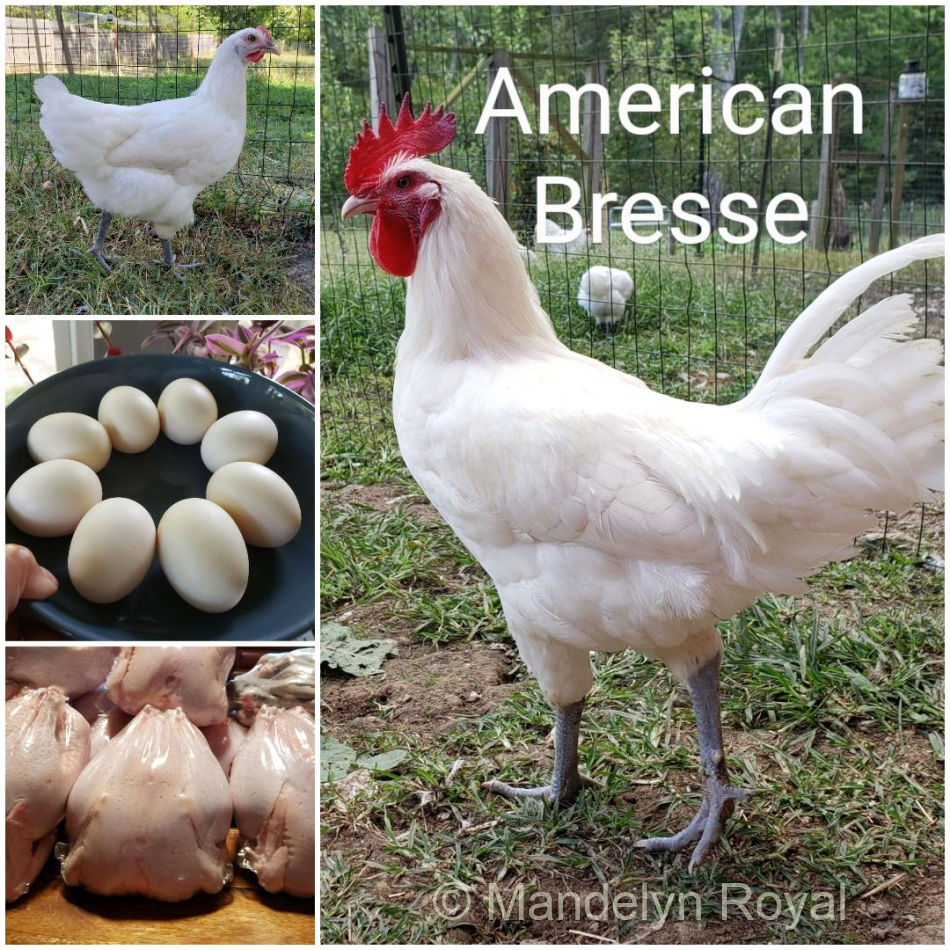
Photo credit: Mandelyn Royal.
Copyright © 2021-2026 Ambresse.com. All rights reserved.
403 S. Lincoln St., Suite 4, PMB 5, Port Angeles, WA 98362-3025
Privacy Policy | Disclaimer | Ambresse Acres | About Ambresse.com | Contact Us | Website Map

This website focuses on the American Bresse Chicken, along with other chicken-related topics. Due to the protections given by France to the Bresse breed, it is important to consistently differentiate when necessary between the Bresse chicken breed of France and North American chickens of direct French Bresse descent. For this reason, we call them American Bresse chickens, repetitively, throughout the website. You might notice that this can start to feel clunky at times. So, in order to write more fluidly, we also use a couple contracted terms to reference American Bresse chickens: “Am Bresse,” or ABC (American Bresse Chickens). Our keystrokes spell out ABC or Am Bresse, but our heads see American Bresse. We hope you will see the same.